Serving your App
Theory Input
We have created a very useful application now. But what if we want to share our application with other people in the web? In the following chapter we will show you one way to serve your application in the web using shinyapps.io. There are also other sites you could use to serve you web application but because shinyapps.io has a great and easy connection to RStudio and a very nice documentation, we use it here. In its basic version it is for free and we do not require an own server. Obviously, there are some limitations in the basic version like being allowed to serve only 5 applications and actively using the applications 25 hours per month. For our use, the limits are sufficiently large.
0. Open the application
Let’s create a new folder named e.g. sales_dashboard_shiny and copy the sales dashboard in it.
It is advisable to rename - if not already the case - the application to sales_dashboard_shiny.Rmd.
To make sure that everything runs successfully, click on Run Document.
If it does not run, please check in one of the previous chapters why that might be the case.
1. Installing and loading rsconnect
In order to run a web application on
shinyapps.io we have to load the rsconnect package.
It allows deploying RMarkown documents, Shiny applications and other files to publishing platforms.
We install the package and load the package by running the following commands in the console:
install.packages("rsconnect")
library(rsconnect)
2. Register and connect your account
Now, we are required to register on shinyapps.io.
One particular advantage is that you can use your GitHub account to register.
To do so, go to
shinyapps.io - Sign Up and click on Sign Up with GitHub.
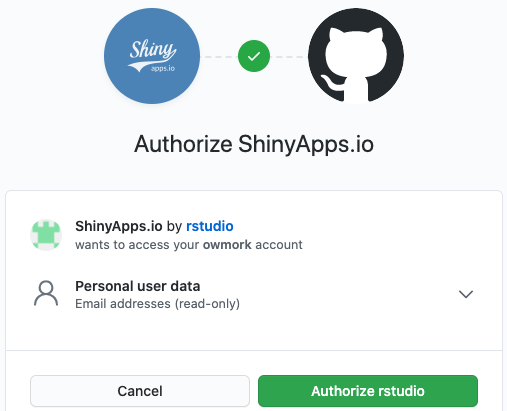
You will be asked to authorize shinyapps.io to use your GitHub profile information, which facilitates the registration. Of course you can also register without GitHub, if you prefer.
After authorizing or signing up without GitHub, you have to choose an account name. This name will be included in your URL for your web application, e.g. https://my_account_name.shinyapps.io/my_web_application_name/.
When you chose a name fulfilling the requirements, you will be redirected to your shinyapps.io dashboard.
In order for RStudio to connect to your shinyapps.io account, you need your own personal token that can be found under Account -> Tokens.
You should see your token there and click on Show.
Then, a window containing with an incomplete R function rsconnect::setAccountInfo() with the argument secret missing.
Please never share your secret token with anyone!
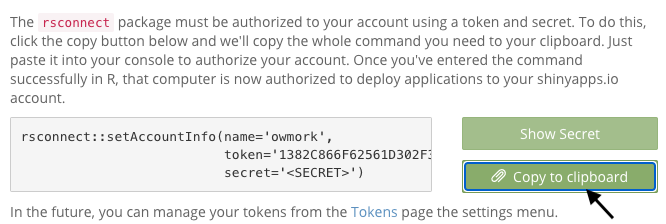
To copy the complete command including all required arguments, either click on Show secret and copy the command or click on Copy to clipboard and take the command from there.
You can now paste the command in your R console which will establish the connection between RStudio and your shinyapps.io account. Now you are ready to publish your app.
3. Publish your application
To send your application to shinyapps.io, you have to click on the publish icon highlighted by the arrow in the screenshot below.
In the following prompt you should see your files you want to publish and your shinyapp.io account.
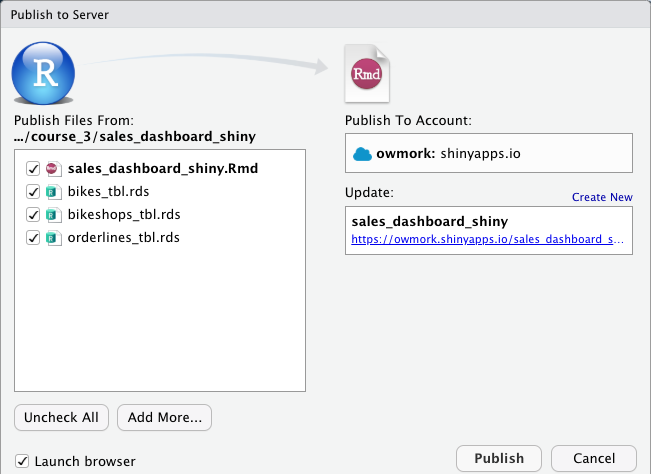
Confirming will cause the building of your app on shinyapps.io which - especially when done for the first time - will take some time.
That is because when you deploy your application, rsconnect sends all required packages, their dependencies, your R version and of course your application to shinyapps.io.
This whole environment from your local machine is replicated on shinyapps.io, that means for example all packages first have to be installed which takes some time.
Please note, that you should not have any install.packages() calls in your code.
After the first built publishing will become significantly faster as these packages are already installed on your shinyapps.io environment.
When you make changes to your app and want to update your web application, you can also use the function rsconnect::deployApp("/path/to/your/app") to add changes manually instead of using the publish button.
4. Dealing with error messages
Although your code successfully runs when you use Run Document, that does not necessarily mean that it runs on your shinyapps.io as well.
Then, you won’t see your web application but an error message stating:
Error: An error has occurred. Check your logs or contact the app author for clarification.
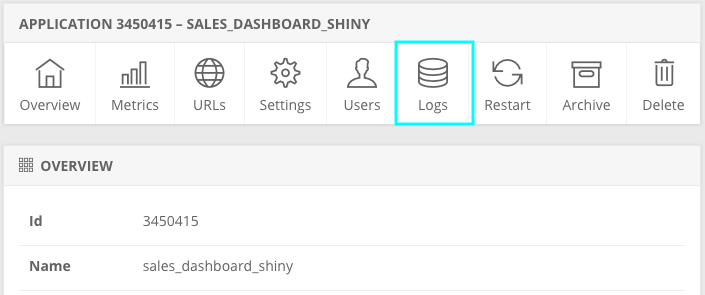
To get a better understanding of how to troubleshoot, you have to go on shinyapps.io and check the logs for the full error message.
Go to the application and you will see the tab Logs on the top, which will show you what you would usually see in your R console.
Two common errors that often occur when attempting to publish the application for the first time are:
- Your data should be located in your app directory. Copy it in the same directory and change the code accordingly. The application only has access to the data in the application directory or within a subdirectory. Data in a subdirectory must be referenced with relative paths rather than absolute paths.
- Even if referenced by already loaded packages, all packages need to be installed. Note that you only want to load but do not want install packages in your code. Installing should be done in the console.
In general, it is good practice to always have a look at the error logs if something has gone wrong.
In both cases, the logs would have given a useful hint to understand the error.
Alternatively, entering rsconnect::showLogs("/path/to/your/app") will show you the logs directly in RStudio.
If you make changes in your application and want to publish them, you only have to click on the publish button or use the command explained in step 3. You don’t have to repeat the other steps.
You can have a look at the published website using the link below:
Challenge
Your challenge is to follow the instructions and publish your application from the previous chapter!
Please provide use with the link to your application using the submission form in the next chapter!